Getting started with TermLink: install, sign in, and reach your machine
Install the host with npm, sign in with Google, run one command on the host, and connect from any browser. No SSH keys, no VPN, no open ports.
TermLink gives you a live terminal, Claude session, or Codex session on a machine you own, from anywhere else — a browser or your phone. There is no SSH key to distribute, no port to open on your router, and no VPN to dial into.
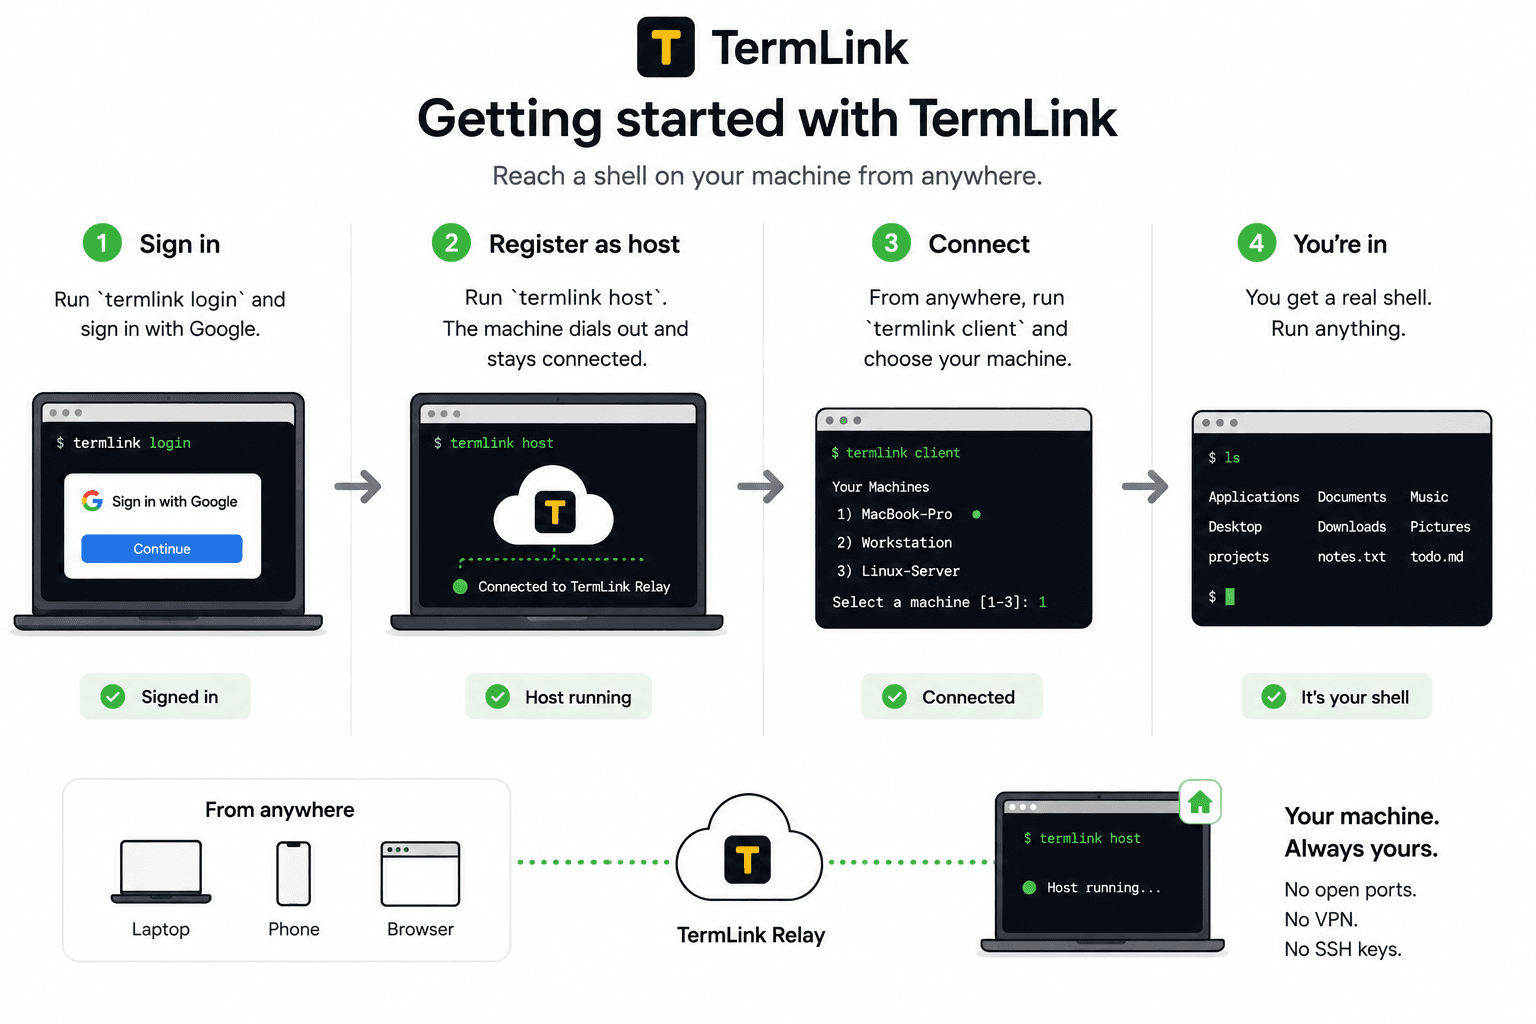
This post walks the whole path: install, sign in, move to the folder you want, run the host, and connect to it.
What you need
- Node.js 22 or later, and npm, on any machine you want to reach (macOS, Linux, or Windows).
- A Google account. That is the whole credential story — TermLink has no passwords, no PINs, and no keys for you to manage.
Step 1 — Install the host
On the machine you want to reach, install the CLI globally:
npm install -g @termlink/cli
That is the whole install. Nothing is compiled on your machine — the PTY binary comes prebuilt for macOS, Linux, and Windows as part of the package, so there is no separate download, checksum, or unsigned-binary dialog to get past.
Step 2 — Sign in
Still on that machine, run:
termlink login
Your browser opens, you sign in with Google, and the credentials are stored locally on that machine and refreshed automatically. You do this once per machine — not once per session.
Nothing about this step opens a port or exposes the machine. It just tells TermLink which account this machine belongs to.
Step 3 — Go to the folder you want open
Still on that machine, before you run the host:
cd ~/work
This is the step people skip, and it is the one that decides what you can reach later. The directory you are standing in when you run the next command becomes the boundary: a session can only open inside it, and nothing above it is reachable at all. Which folder underneath it a session opens in is something you pick in the browser afterwards.
Run it from your home directory and every project under it is in range, which is more than you probably meant to hand over. --allow-root adds a second folder if one is not enough.
Step 4 — Run the host
termlink start
(Bare termlink does the same thing — start is the default.) The machine registers under your Google account and dials out to the TermLink relay. That direction matters: because the connection is outbound, the machine works fine behind a home router, a NAT, or a corporate firewall, and it never accepts an inbound connection. There is nothing listening for an attacker to find.
Leave this running. It is the process that owns your sessions. By default it offers three kinds — terminal, Claude, and Codex — and you pick which one to open from the browser.
Step 5 — Connect from anywhere
Open the web client, sign in with the same Google account, and your hosts are waiting in a list. Pick one and start a terminal, Claude, or Codex session. That works from a laptop you have never installed anything on — or from your phone.
Only your own machines appear — the list is scoped to the Google account in your token, so you never see anyone else's machines and they never see yours.
Step 6 — It is a real shell, not a screenshot
Here is a Mac being reached from a Windows box. The window at the back is the Mac itself; the one in front is TermLink on Windows, connected to it. Watch ls run:
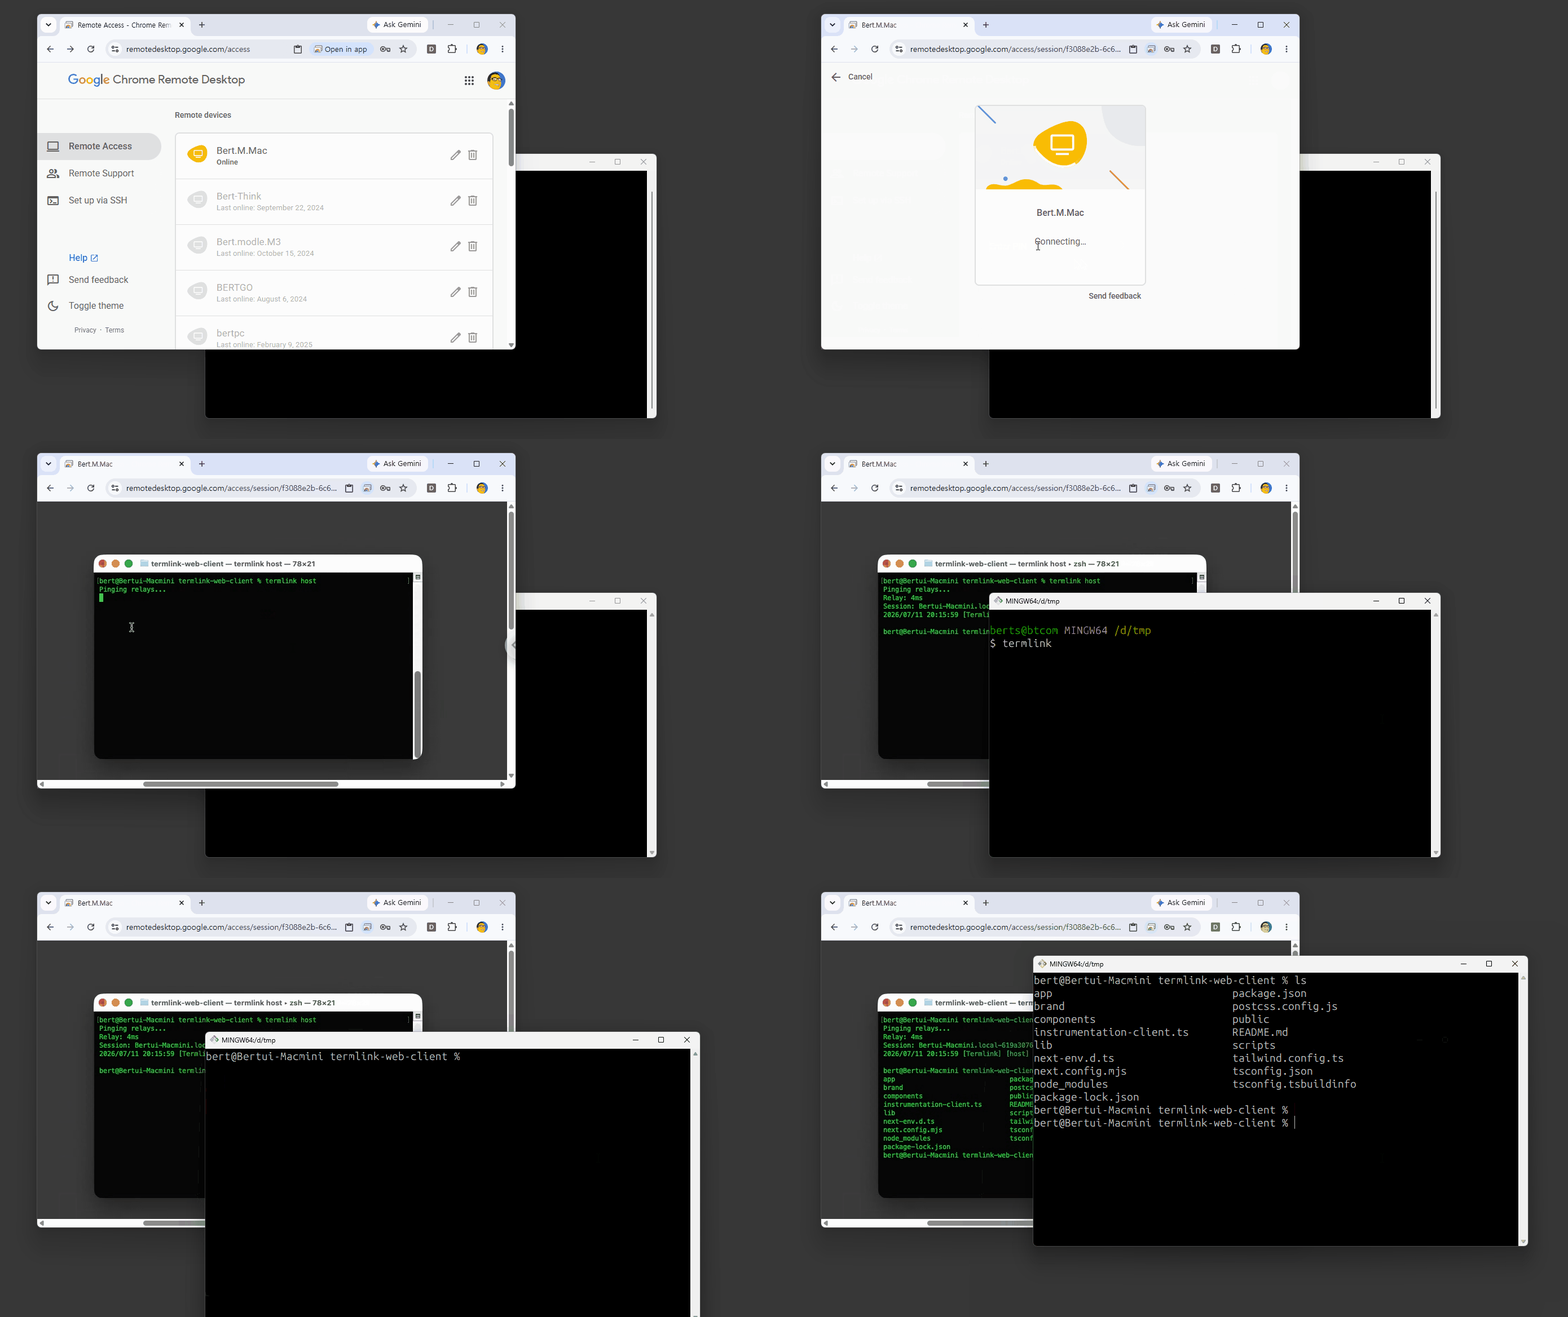
The output is identical on both sides because it is the same shell. TermLink is not streaming a picture of a desktop — it is relaying the terminal itself, byte for byte.
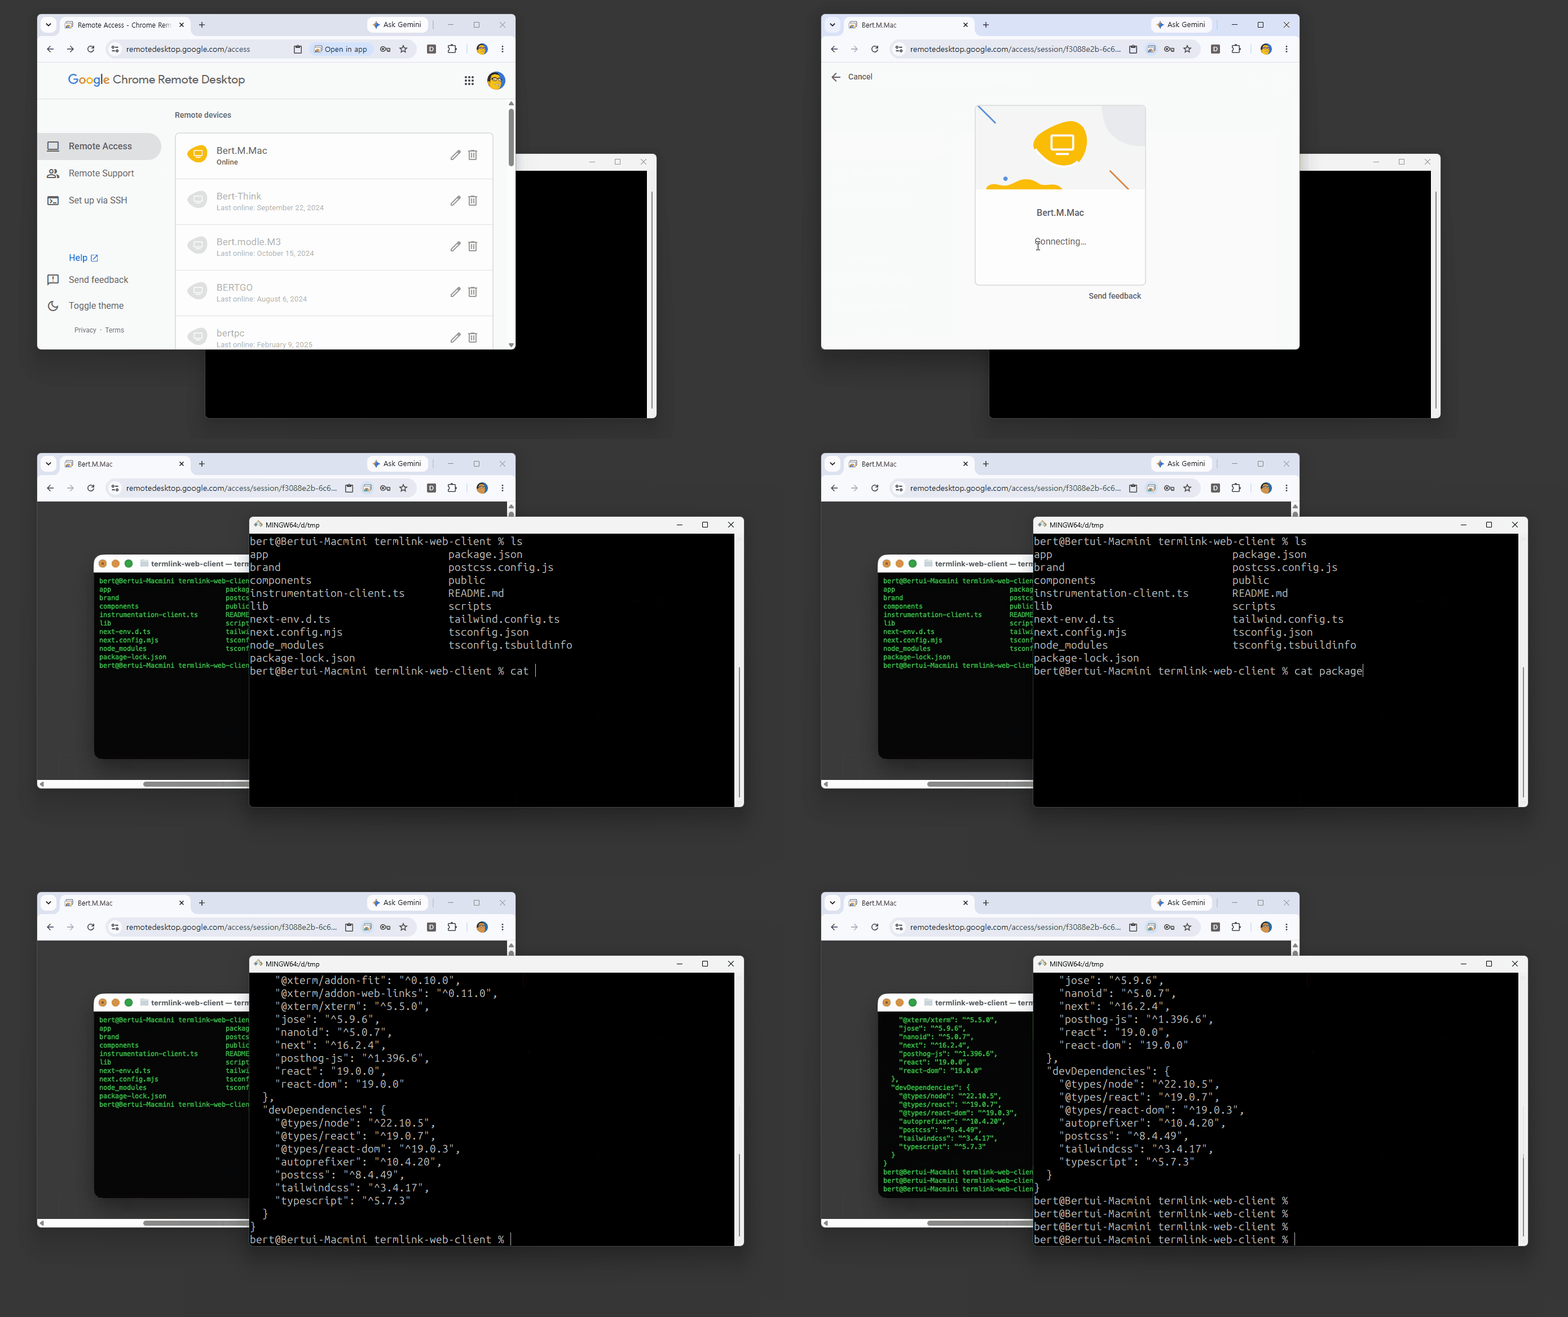
That distinction is why it stays usable on a bad connection and on a phone screen, and why cat, a log tail, or a full-screen terminal UI all behave the way they would locally:
What this replaces
If today you would reach for SSH, you have to expose a port and manage keys. If you would reach for Chrome Remote Desktop or TeamViewer, you have to stream an entire desktop and keep the far machine unlocked with a session running.
TermLink mirrors the one window you actually care about — the terminal — and authenticates it with the Google account you already have.
Frequently asked questions
Where do I install it?
Only on the machines you want to reach, with npm install -g @termlink/cli. The device you connect from needs nothing — the web client is a browser tab.
Do I need anything installed on the machine I connect from?
No. The client is a browser. Sign in on any machine or phone and your registered machines are there — the install only happens on the machines you want to reach.
Does it work behind a home router or a company firewall?
Yes, with no configuration. The host dials out, so there is nothing inbound for a router or firewall to block and no port to forward. That is also why it keeps working on a laptop that moves between networks — see how a remote terminal works without SSH or a VPN.
Do I have to keep the host running?
Yes. The termlink start process owns your sessions. If you kill it or the machine sleeps, the machine goes offline until you start it again — TermLink is not a background daemon like tmux.
Is my machine exposed to the internet?
No. Nothing listens on it. What the relay can and cannot see, and where your credentials sit on disk, is set out on the security page.
How do I sign a machine out?
termlink devices revoke <id> — get the id from termlink devices. Useful for a laptop you no longer have.
Does it cost anything?
There is a free plan — four sessions running at the same time, with no time limit. Pricing has the rest.
Next
Now that you can reach a machine, the interesting part is what you leave running on it. See how to run Claude Code remotely on another machine — start an agent on your workstation, close the laptop, and check on it from your phone. For the wider picture, Claude Code remote access.
TermLink keeps your agent running on your own machine and gives you the terminal from anywhere. Register a machine and open its session from any browser. Free plan, no card.